Introduction
Every Expo release is better than the previous one, and the SDK 48 is no exception.
We are not talking about marginal improvements. We are talking about huge updates and new packages like Expo Image and Expo Router.
In this article, we are going to explore what’s new in Expo SDK 48 and will get our hands dirty to test out some of the most exciting updates.
Create a new project with Expo SDK 48
Let’s jump head first, and create a new project with Expo SDK 48.
npx create-expo-app@latest --template tabs
Open it in VSCode, and then run the dev server by running npm start.
Once the metro server is running, you can press i in the terminal to run the app on an iOS simulator, a to run it on Android emulator, or you can just scan the QR code using the Expo Go app on your physical device.
React Native 0.71.3 and React 18.2.0
Expo SDK 48 includes React Native 0.71.3 and React 18.2.0.
React Native 0.71 is the latest version of React Native at the moment of writing this (Released in January 2023). This means that by choosing Expo for your next project, you are up-to-date with the React-Native version.
New Flexbox properties (rowGap, colmnGap)
The long-awaited flex properties gap, rowGap, and columnGap are finally available in React Native. They allow us to specify the spacing between items and rows in a Flexbox.
Let’s open app/(tabs)/index.tsx and let’s render 5 boxes on the screen.
import { StyleSheet, FlatList, View } from 'react-native';export default function TabOneScreen() {return (<View style={styles.container}><View style={styles.box} /><View style={styles.box} /><View style={styles.box} /><View style={styles.box} /><View style={styles.box} /></View>);}const styles = StyleSheet.create({container: {flex: 1,flexDirection: 'row',flexWrap: 'wrap',backgroundColor: 'white',},box: {backgroundColor: 'azure',borderColor: 'aqua',borderWidth: 1,width: 150,height: 150,},});
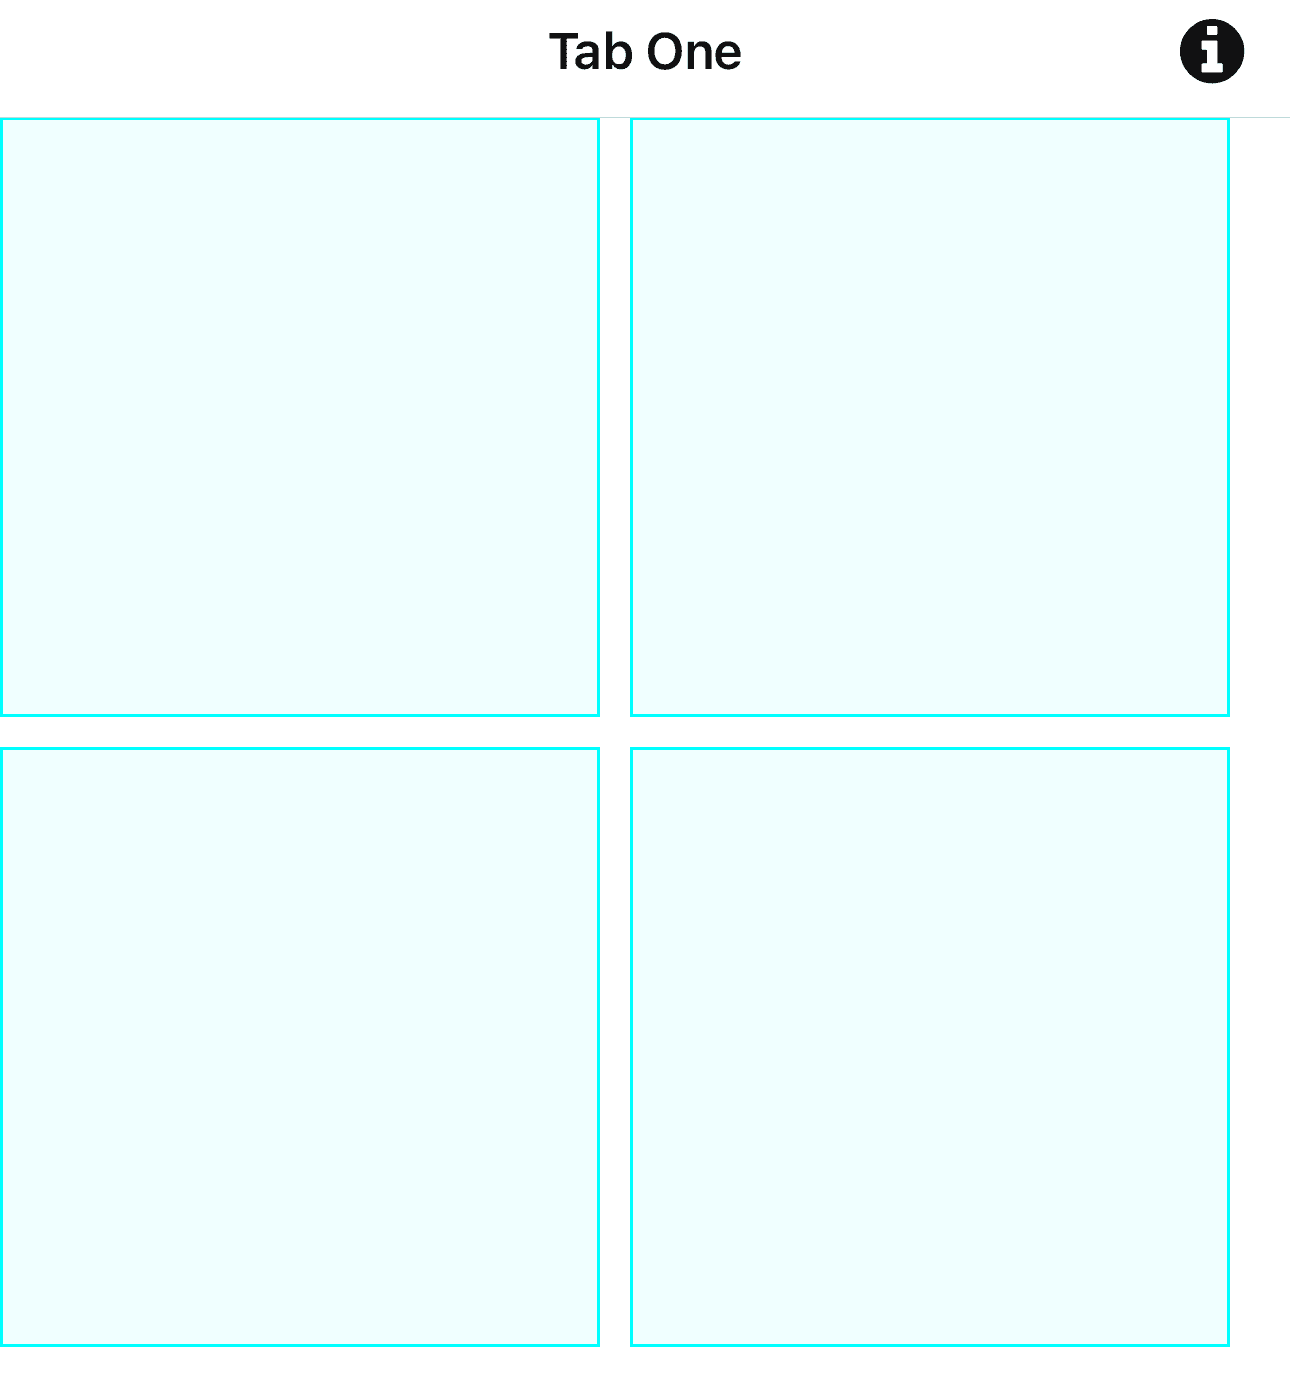
Now, if you want to add spacing between items, you could add margin: 10 to the box styles, but the problem, as we can see below, is that margin is added to all the sides of our box.

Instead of margin, we can add gap: 10 to the container style, and that will add spacing only between our items.

You can also adjust the horizontal and vertical gap between items using columnGap and rowGap properties on the parent container.
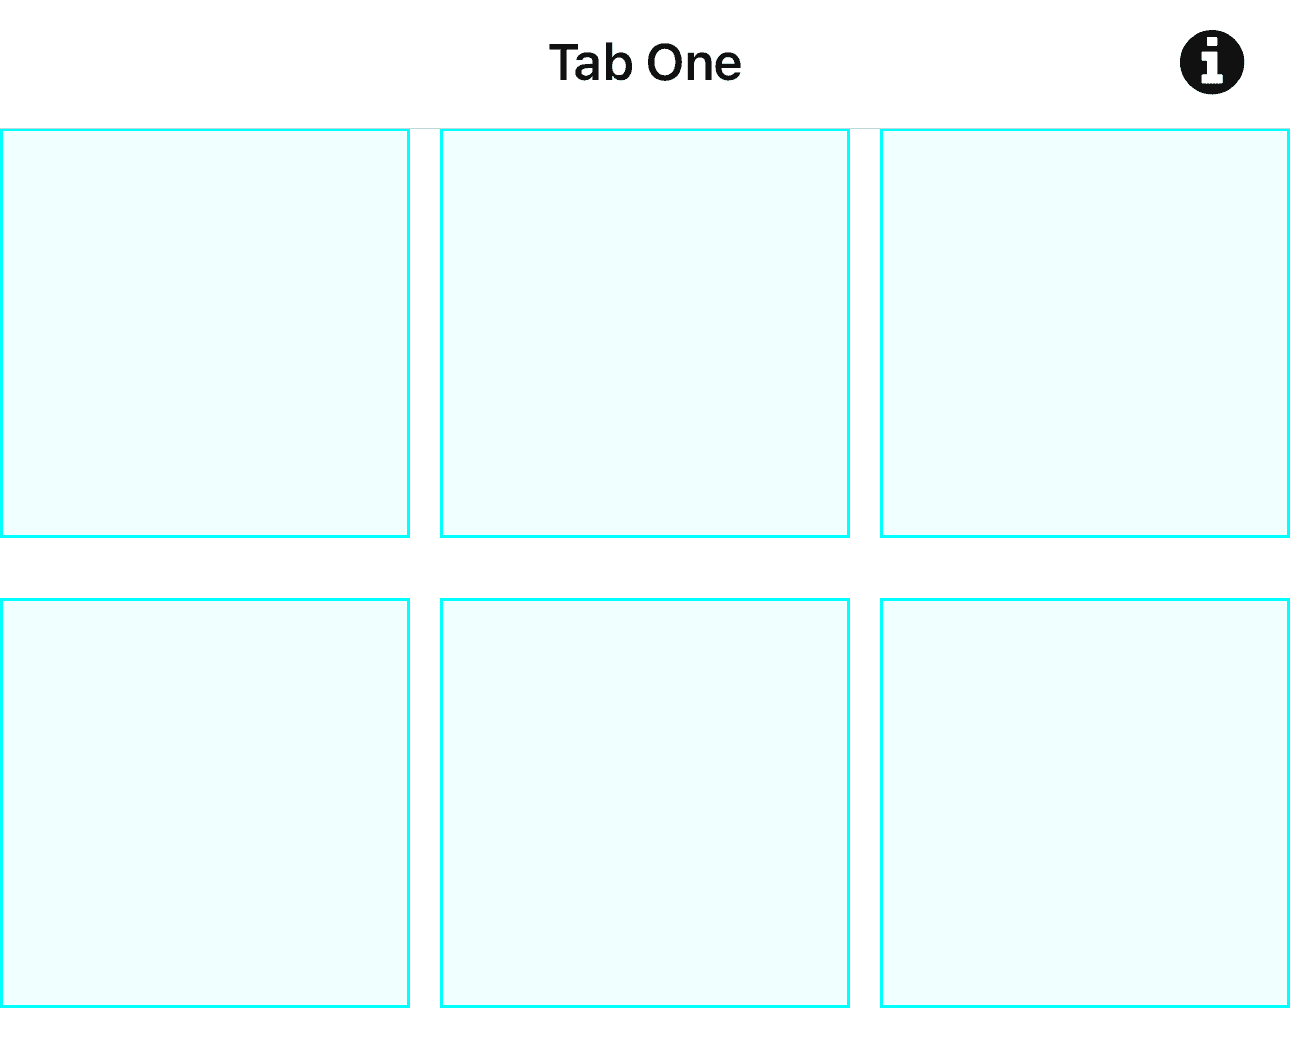
Most of the time we are using a FlatList to build grid layouts. To use gap property inside a FlatList, we use the contentContainerStyle property to specify the gap between different lines, and columnWrapperStyle to specify the gap between the cells of the same row.
<FlatListdata={Array(12).fill(0)}renderItem={() => <View style={styles.box} />}numColumns={3}contentContainerStyle={{ gap: 20 }}columnWrapperStyle={{ gap: 10 }}/>const styles = StyleSheet.create({container: {flex: 1,backgroundColor: 'white',},box: {backgroundColor: 'azure',borderColor: 'aqua',borderWidth: 1,flex: 1,aspectRatio: 1,},});

Other updates from React Native 0.71.3
React Native 0.71 brings some changes to accessibility, styles, and events with the goal to bridge the gap with WEB development.
- We can use the src property for the image component, instead of source
- New accessibility props (aria-label=, aria-labelledby,aria-modal, id, aria-busy, aria-checked, aria-disabled, aria-expanded, aria-selected, aria-valuemax, aria-valuemin, aria-valuenow, and aria-valuetext)
- aspectRatio supports string values
- fontWeight supports number values
- transform supports string values
PointerEvents for Views:
- onPointerOver, onPointerOut
- onPointerEnter, onPointerLeave
Expo Router v1.0
Expo SDK 48 adds first-class support to Expo Router, and even the default templates have moved to Expo Router. That means that Expo is going all-in on its new navigation library.
Expo Router is a filesystem-based routing API built on top of React Navigation.
We create files inside our project, and Expo Router automatically creates routes for us.
We move between screens using URLs and a <Link />, in a very similar way we are navigating the web.
With dynamic routes, you can have a screen app/user/[name].js and the name will be parsed dynamically from the route and passed to the screen props so we can query the data for a specific user. For example, if we redirect to /user/vadim our screen will receive the value vadim for the dynamic field name in the route.
Expo Router automatically creates deep links for every page, which was always a pain for mobile development.
You can test the deep links using uri-scheme package
npx uri-scheme open exp://192.168.0.47:19000/--/modal --ios
If you want to learn more about Expo Router, check out this tutorial: Building Navigation in React Native with Expo Router
Expo Image v1.0
Expo Image is a cross-platform React component that loads and renders images. It is intended to be a successor to React Native’s <Image> component.
But, what’s wrong with the <Image> component?
The short answer is performance, as always. (flickering, bad caching).
Expo Image is designed for speed, supports many image formats, improved caching, and also adds support for common image patterns like placeholders, transitions, and blurhash.
Let’s install expo-image
npx expo install expo-image
And let’s render an image
import { Image } from 'expo-image';const blurhash ='|rF?hV%2WCj[ayj[a|j[az_NaeWBj@ayfRayfQfQM{M|azj[azf6fQfQfQIpWXofj[ayj[j[fQayWCoeoeaya}j[ayfQa{oLj?j[WVj[ayayj[fQoff7azayj[ayj[j[ayofayayayj[fQj[ayayj[ayfjj[j[ayjuayj[';<Imagestyle={styles.image}source="https://picsum.photos/seed/696/3000/2000"placeholder={blurhash}contentFit="cover"transition={1000}/>image: {flex: 1,width: '100%',backgroundColor: '#0553',},
Let’s put it to the test, and render more images on the page, by
<FlatListdata={Array(120).fill(0)}renderItem={({ index }) => (<Imagestyle={styles.image}contentFit="cover"source={`https://picsum.photos/seed/${index}/720`}/>)}numColumns={3}contentContainerStyle={{ gap: 20 }}columnWrapperStyle={{ gap: 10 }}/>
We can do the same in the second tab, and use the <Image> component from React Native and compare the visual performance of the 2.
Other important updates in Expo SDK 48
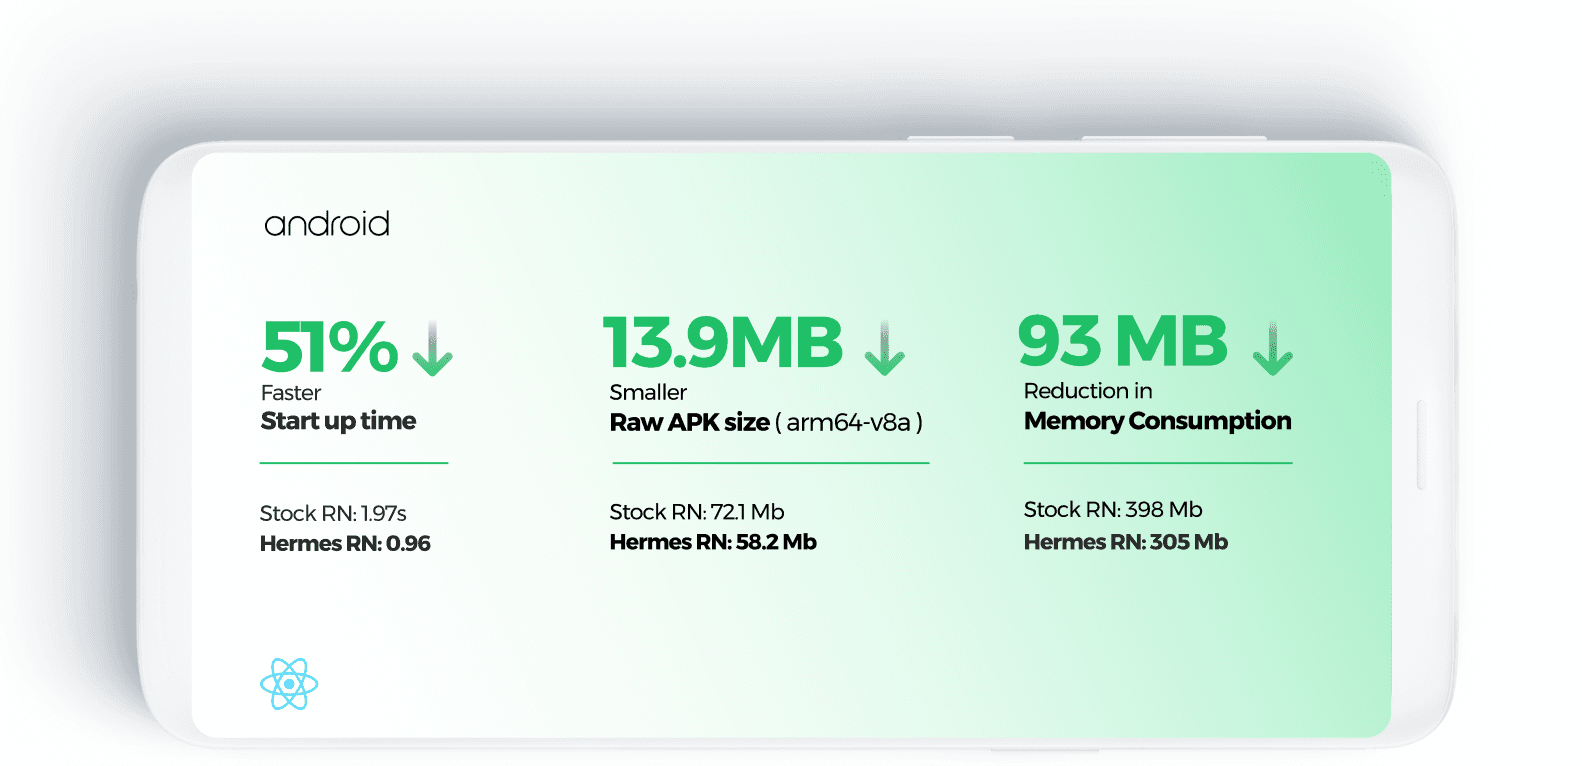
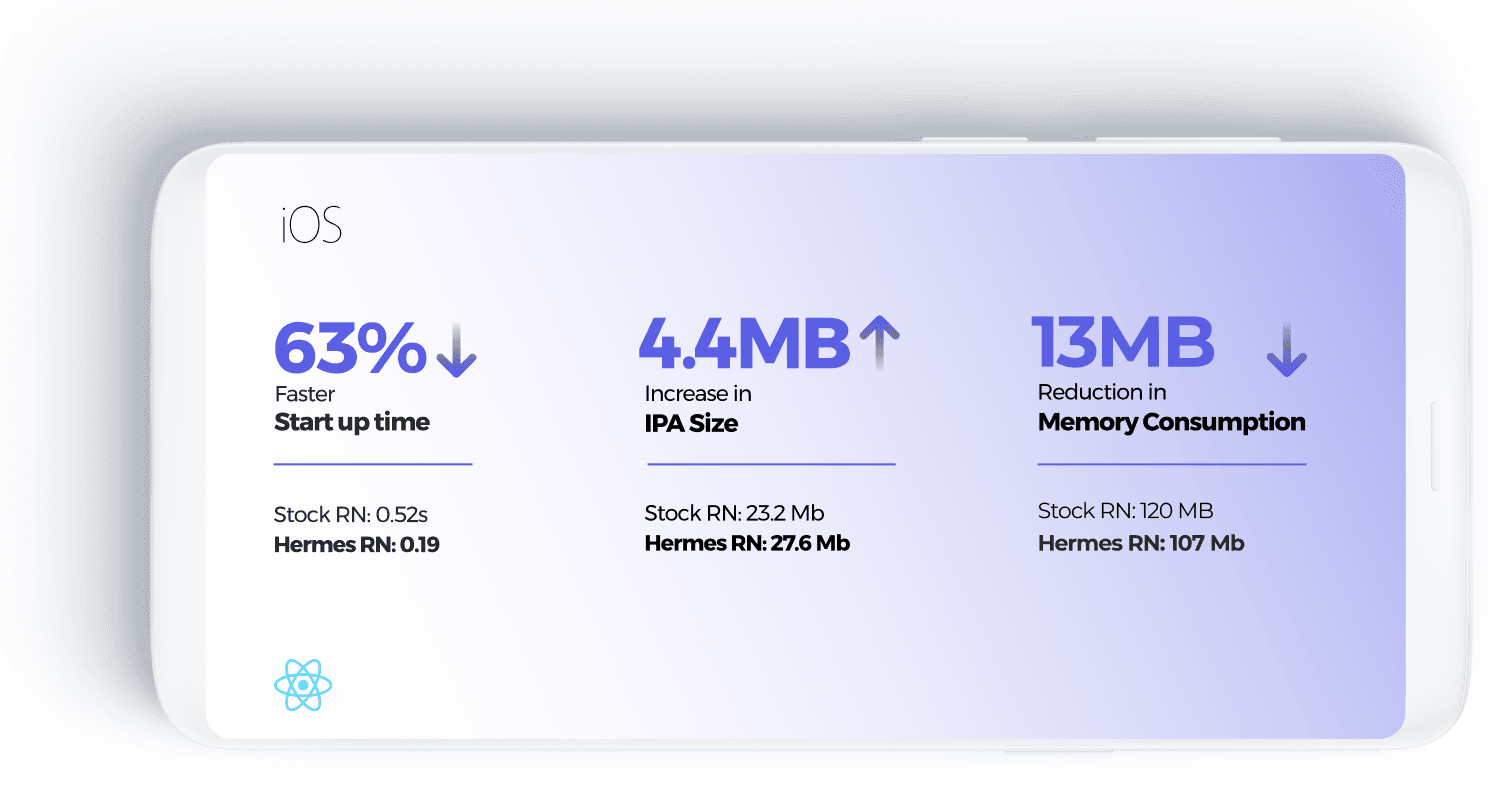
Hermes is now the default JavaScript engine
JavaScriptCore (JSC) was replaced by Hermes as the JavaScript engine.
What does that mean for you, as a developer?
-
Faster startup time
-
Smaller app size
-
Better memory consumption
-
Better debugging experience


If you want to make sure that your app is using Hermes, you can console.log('Is using Hermes: ', !!global.HermesInternal); and then check the logs.
Support for right-to-left languages in Expo GO
To enable RTL support in your application using SDK 48 or later, install the expo-localization package and add the following properties in Expo config
{"expo": {"extra": {"supportsRTL": true},"plugins": ["expo-localization"],}}
What’s up with the New Architecture?
Expo SDK 48 supports the New Architecture/Fabric in all Expo packages (except expe-dev-client and expo-go).
However, it is still not recommended to use the New Architecture yet because you will most likely run into issues caused by some third-party libraries that still need to be migrated.
Faster iOS builds with EAS
EAS is now using M1 chips for their servers that are building your applications, resulting in faster builds for iOS by an average of 40%.
How to upgrade your app?
- Install the new version of the Expo package npm install expo@^48.0.0
- Upgrade all dependencies to match SDK 48: npx expo install --fix
- Check for any possible issues in your project dependencies: npx expo-doctor


